Nakamichi CD 400 head unit
Since I will be doing a complete interior swap (grey leather to black leather) at the same time, some of this job will be easier, in a sense. It will be harder in that I will have to put more hours into the job before it is ready to listen too, though.
So here we go... I have ripped out all the interior(s) so they won't be in my way. I installed a new fresh air fan, since mine has been chirping for years. Now it is time to start preparation by running wires for the stereo system. 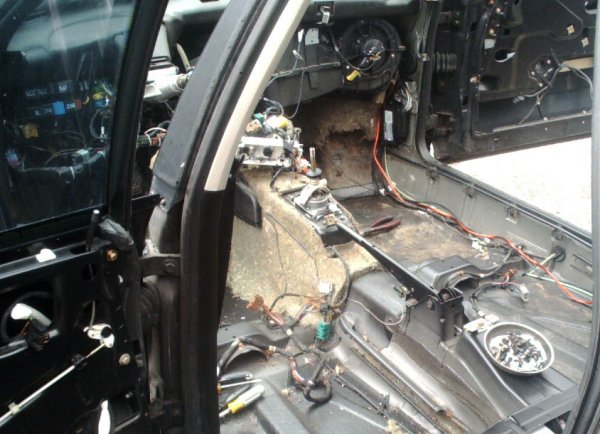
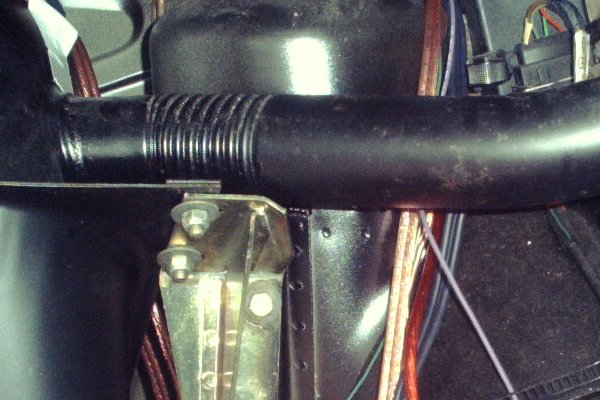
as you can see, I've already started running the main power wire My 8 gauge power cable was bought as part of a kit pre-assembled with a fuse holder, 40 A fuse, and ring terminal for the battery. Since I don't use a vented battery, first it goes through the firewall via the hole the little hose used to go through. Since I don't have A/C any more, it then dives in where the outside temperature sensor used to be, into the fresh air plenum and through the grommet that used to be for that sensors wire. From there it follows the path the rest of the car's front to rear wiring takes, into the trunk. 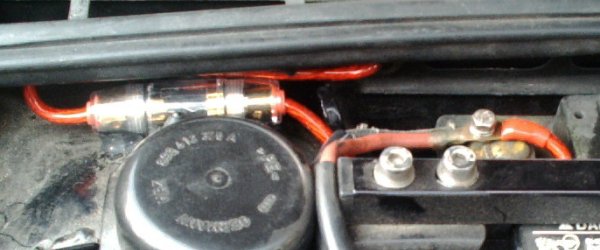 I ran two sets of RCA terminated interconnects, a dedicated ground wire for the radio, and the right front speaker wires through the right side plastic loom guards (I added a rear one, since there didn't used to be much there to protect). Feed the speaker wire through the door boot and leave enough to work with (and a bit more). The other two start at the radio location, leaving a bit extra to allow for installation. Make sure all these wires are able to be tucked up securely out of the way. I used zip ties every 6" or so, once they were pretty close to being right, to bundle them up, and then used a couple more zip ties to secure them loosely. 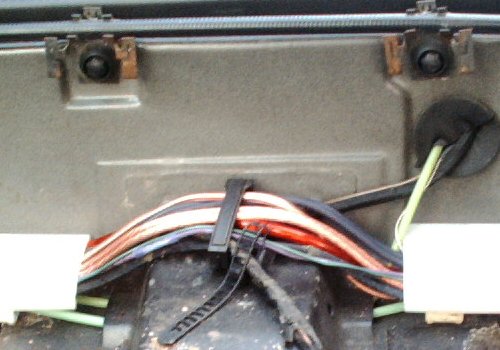
showing the new wiring running under the factory protectors In the rear, they all come pouring out into the trunk over the power lock pump, in the general amplifier location. The left front speaker wire runs down the left side loom guards, through a friendly hole in the back seat support, and then crosses in front of the fuel tank with the left rear wire. They join the right rear wire and meet all the others in the right trunk well. Actually, if you notice in the pictures, the rear speaker wires were soldered to the drivers in the shop and then fed into place as the rear speakers were installed. The rear speaker wires were duct taped to the top of the gas tank to relieve strain - hey, Audi does this, don't call John Ashcroft on me! 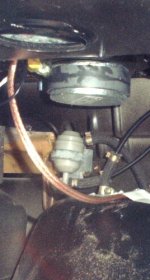 
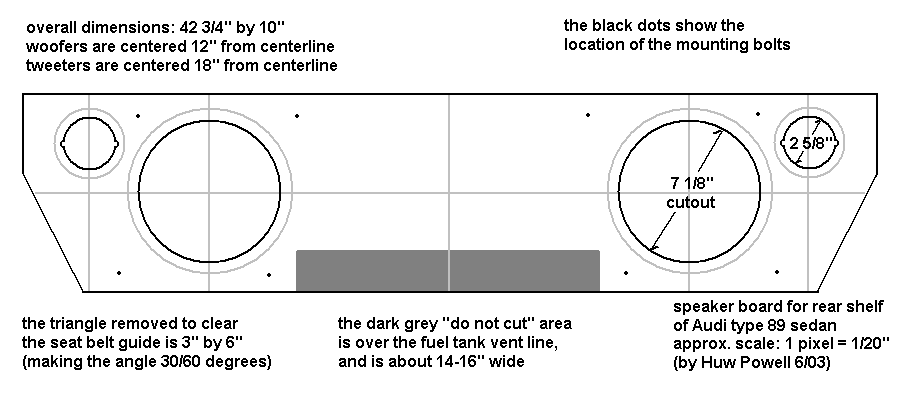
For the rear deck I carefully cut a piece of 3/4" MDF to cover all the old holes but not the seat belt feed-throughs. It reaches front to back across the two high transverse ridges on the cardboard shelf, which correspond to metal ridges below. These ridges are, luckily, level and parallel. After cutting holes for the woofers and tweeters, I marked and cut out some metal to clear the back of the woofers. The MDF is covered in black "speaker carpet" to match the parcel shelf cover, and bolted securely in place. 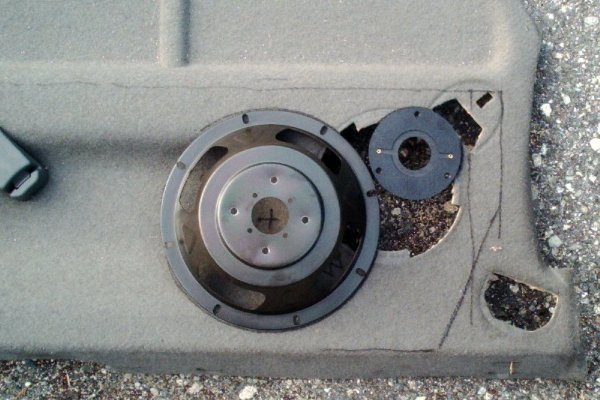
the planning stage, mocking up driver layout on old shelf
(click on image to see this plan full-size)
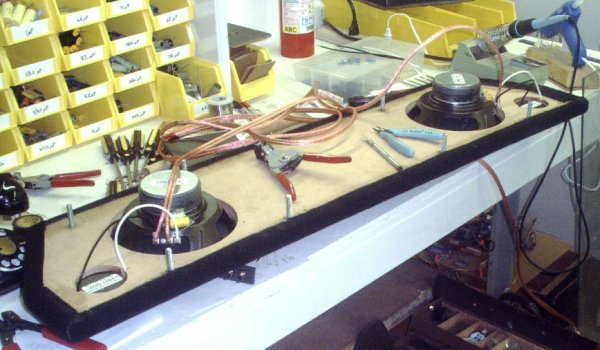
shown with drivers, ready to be installed
from the underside, showing wiring and mounting bolts
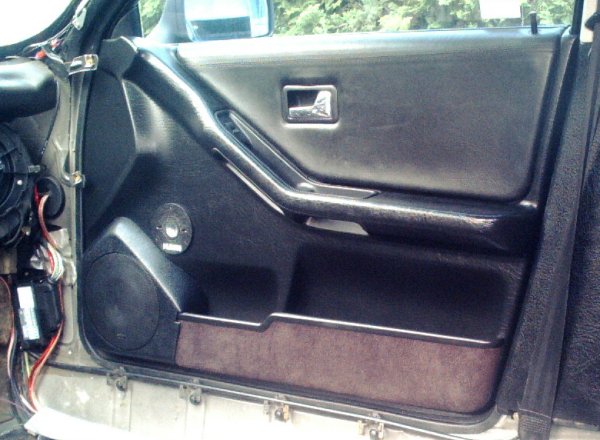
and, finally, in the car and bolted down The front doors were saved by the Phonocar pockets, since the inside panel is far too convoluted to use a simple "speakers on a board" set up. This pocket replaces a section at the front of the door bucket, and holds a 6.5" speaker fairly securely. There is also a flat area above it where I can mount my tweeters, which has a good inch or more of space behind it before you encounter door metal. 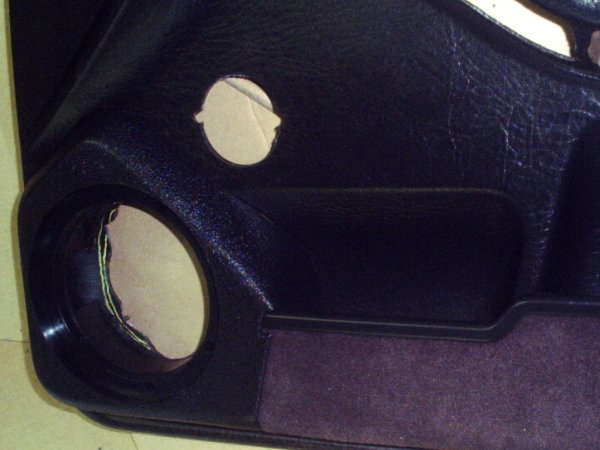
(door panel prepared with pod and cutout for tweeter) Because the woofer magnet would hit door metal first, the panel must be installed before the woofer is mounted. Whoops, it still hits just a little, and it's too late to whip out the air chisel, even though I am zoned for commercial use. All that needs to be removed is a little arc maybe 2" wide and 1/2" into the metal above the hole behind the pod. Not too bad. 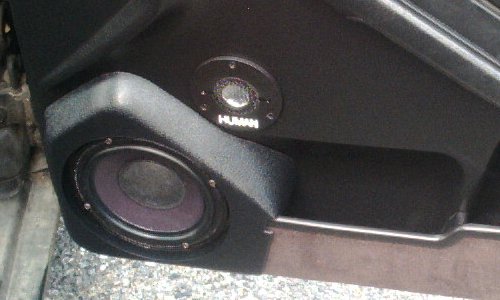
I have reinstalled the door panel, and here are the drivers in place
the grill has been added, here you can see more of the wire routing
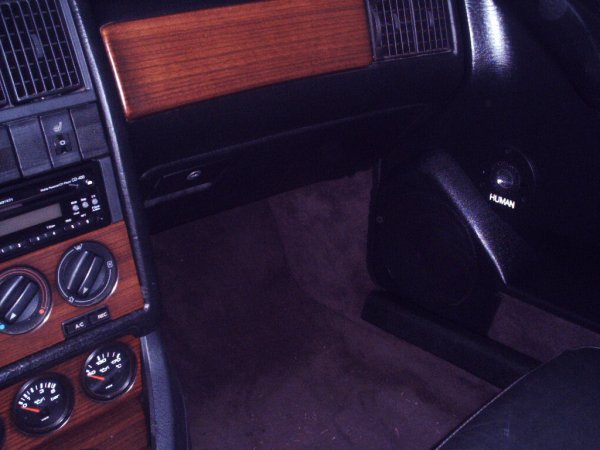
This photo from after completion of the whole job shows how nice they look in the end. The CD player/radio thing. Installation is pretty easy - the support cage slides right into the DIN opening in the Audi dashboard "subframe" - the thing that goes from the vent outlets to the heater controls - there are about six wires and a few cables to hook up:
The important thing is, when things are in pieces, to lay out these wires and make sure they are all long enough to hook up to the back of the radio when the dashboard parts are in place. This means being about 6" to a foot too long. There is no way to photograph this usefully, I am afraid, but here is the final result: 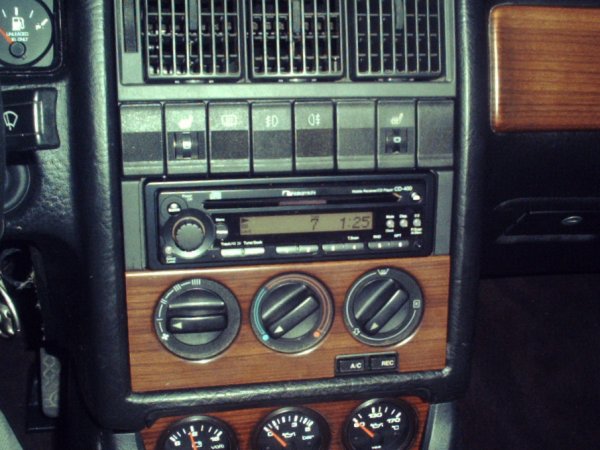 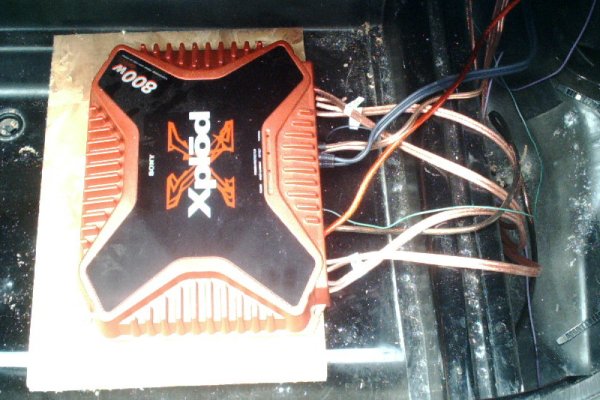
For testing, the amplifier is hooked up, but not bolted into place.
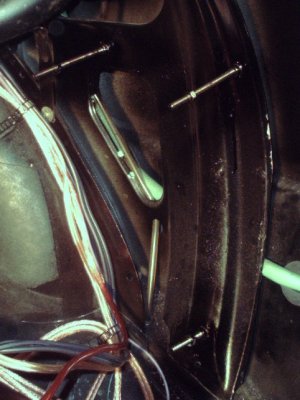
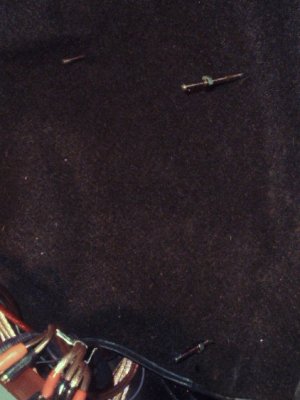
Here you see the threaded rod I mounted to some inner frame members.
I bolted on the painted board, forgot to photograph it, and then mounted the amplifier In 2012 I retired the black car for various reasons and bought a grey one (1988, about 300k miles). It took me a couple of years, but finally a mildly leaking heater core sent me into the depths... |