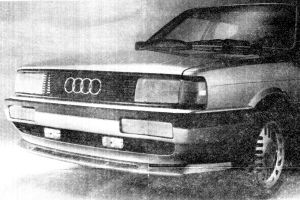
These comments can be extrapolated backwards to the '84 and earlier styled cars, but will be primarily focused on the post-facelift '85 - '87 Coupes GT and 4000s C, CS, and Quattro (as shown above). First a few general comments. 1. The stock US headlights are awful, and even worse when worn and pitted. If adding foglights is your way to fix this, you will just have a mess. You'll still have poor lighting in general, and your auxiliary lighting will probably blind oncoming traffic while not providing a quality low beam pattern. If you really love your old type 85, get some European spec headlights, in either the H4 only or H4/H1 design, and install them using relays. If what you want are actual, real fog lights to aid in poor visibility conditions, read on. 2. You cannot even fantasize about using the location of the reflectors in the front bumper for auxiliary lighting. They cover the bumper mounts, and there is a lot of metal behind them that you cannot remove. 3. Obviously, you can mount any kind of fog light under the bumper, generally speaking. There is enough room, and the bumper has a nice solid 1/4" thick lower horizontal "beam" to work with. Just try not to smash the lights on snowbanks... 4. The point of this file is mostly to describe the optional, dealer installed, factory fog light set up for those who wish to duplicate or imitate it.
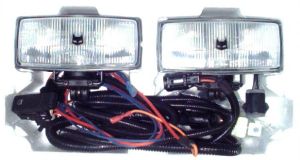
1. Disconnect battery. 2. Remove the three sections of lower grille. Center grille may be discarded. 3. blah blah blah 4. 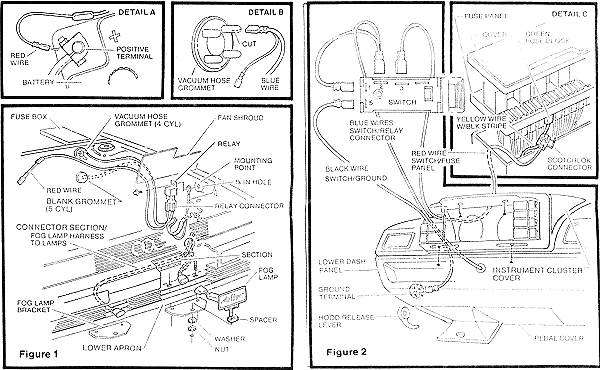
Tools Required: Utility knife, tin snips, Dremel, keyhole saw, or hacksaw blade Follow illustration above for size and location of cut outs required in the lower O.E. center grill. NOTE: Scribe/mark cut outs per dimensions shown first. First cut center two horizontal ribs plus inside vertical rib (B) for a 6 3/4" opening. Second cut out a 3" x 3/8" notch on inside lower rib (A) to allow for lamp mounting base clearance. 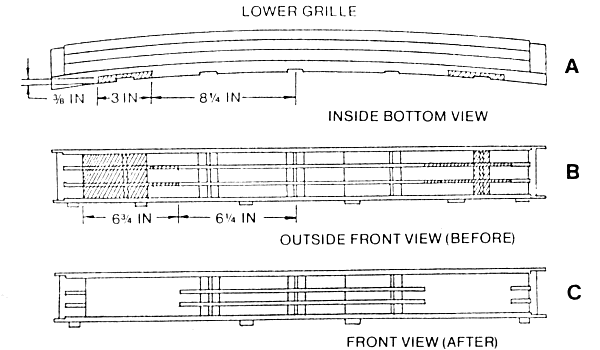
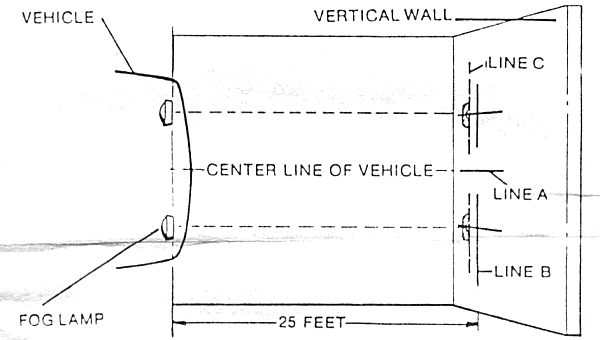
Correct lamp aiming is necessary for maximum performance and safety. Park vehicle on level surface 25 feet from a vertical wall. Mark a vertical line (A) on the wall projecting the center line of the vehicle. Measure distance from center of vehicle to the center of each foglamp. Using this measurement, mark a vertical line projecting location of lamps from center line of the vehicle. measure height of fog lamps from the floor to center of lenses. Place a horizontal line (B) on wall. From this line, measure down 3" and mark horizontal line (C). Switch on fog lamps and adjust beam pattern cut-off line to line C. Tighten fog lamp mounting nut.
NOTE: State vehicle codes require fog lamps to operate in conjunction with low beam headlamps only. --------------- EDITOR'S NOTE: Portions of this file were copied from the instructions provided with the illustrated kit. Copyright of those parts is held by Volkswagen of America, Inc. (3/86) |